Leak Detection Quakers Hill: How Plumbers Find Hidden Leaks Without Digging
Quick answer: Hidden water leaks in Quakers Hill can often be located without digging up floors, walls or gardens. Professional plumbers use non-invasive leak detection methods such as pressure testing, acoustic listening equipment, thermal imaging and targeted moisture testing to narrow down where water is escaping.
The goal is not to start breaking concrete or cutting into walls until the leak has been properly located.
A leaking pipe beneath a concrete slab needs a different approach from a leaking pipe inside a wall, while an underground water line in the yard may require different testing again.
The more accurately the leak is located, the less unnecessary damage may be needed to access and repair the affected pipe.
This guide explains how plumbers find hidden water leaks in Quakers Hill, the signs that may indicate a concealed leak and what happens once the source has been identified.
What’s in This Guide
- Common signs of a hidden water leak
- Why hidden leaks can be difficult to find
- How plumbers investigate concealed leaks
- Water meter testing
- Pressure testing
- Acoustic leak detection
- Thermal imaging
- Moisture testing
- Finding leaks behind walls
- Finding leaks under concrete slabs
- Finding underground leaks
- When digging may actually be required
- What happens after a leak is located
- How to reduce future water damage
- Frequently asked questions
Hidden Water Leaks Usually Leave Clues
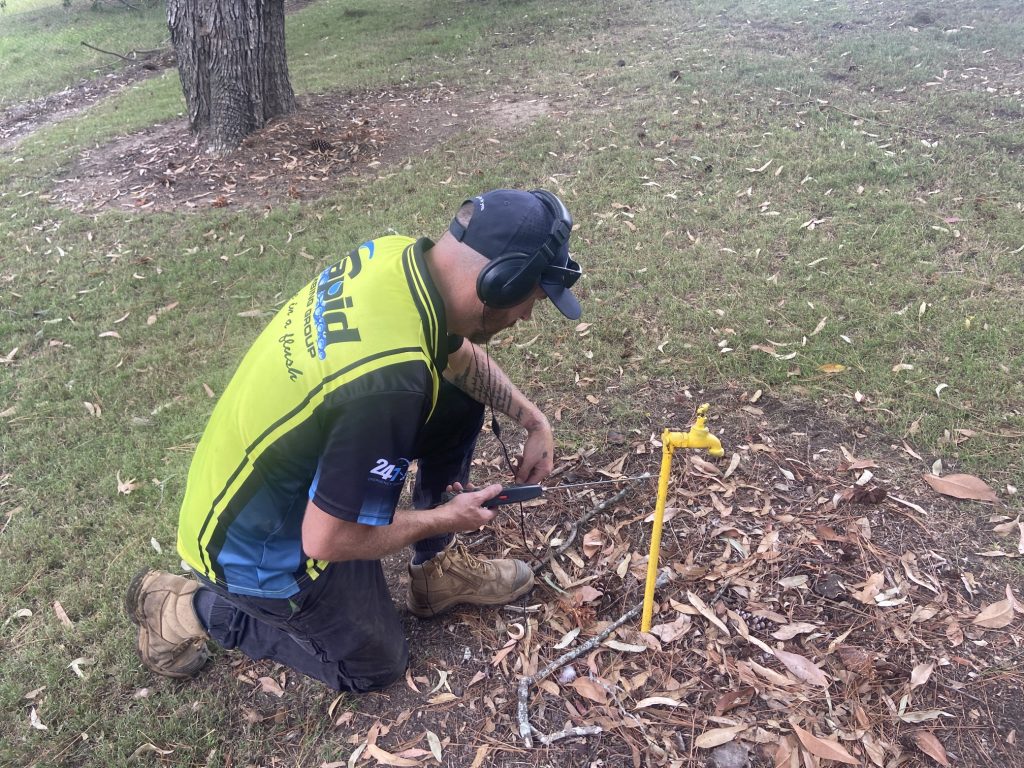
A concealed leak may not immediately produce a visible stream of water.
Instead, the first signs can be subtle.
You may notice:
- an unexplained increase in your water bill
- the water meter moving when no taps are running
- damp patches on walls or ceilings
- peeling or bubbling paint
- warped flooring
- mould or mildew appearing repeatedly
- musty smells
- wet areas around skirting boards
- unusually warm or cool areas on a floor
- reduced water pressure
- the sound of running water when fixtures are turned off
- unexplained puddles in the yard
- unusually green patches of grass
- water appearing around concrete or paving
One sign alone does not always confirm a leaking pipe.
However, several symptoms appearing together are a good reason to arrange professional leak detection.
Finding the problem early may help limit water damage and reduce the amount of repair work required.
Why Are Hidden Leaks Difficult to Find?
Visible plumbing leaks are usually straightforward.
If water is dripping from a tap connection beneath the kitchen sink, the source is easy to see.
Hidden leaks are different because the damaged pipe may be located:
- inside a wall
- beneath flooring
- under a concrete slab
- above a ceiling
- inside a roof cavity
- underground
- behind bathroom waterproofing
- beneath paving
- under landscaping
Water can also travel away from the actual leak before becoming visible.
For example, a pipe may leak inside a wall while the first damp patch appears several metres away near the floor.
This is why simply opening the wall where water appears may not reveal the source.
Professional leak detection aims to narrow down the location before invasive work begins.
How Do Plumbers Find Hidden Leaks Without Digging?
Plumbers can use several diagnostic techniques.
The exact method depends on:
- where the leak is suspected
- whether the pipe is pressurised
- the type of plumbing system
- the construction of the property
- whether water damage is already visible
- whether the leak is above or below ground
In many cases, more than one test is used.
The plumber begins with the available clues and gradually narrows the search area.
Step 1: Check Whether Water Is Still Flowing
One of the simplest starting points is checking the property’s water meter.
Turn off:
- taps
- washing machines
- dishwashers
- irrigation systems
- toilets that may be refilling
- other water-using fixtures
If the meter continues registering water use when everything should be off, there may be water escaping somewhere in the system.
A meter test does not tell you exactly where the leak is.
It helps confirm that further investigation may be needed.
Step 2: Pressure Testing
Pressure testing can help determine whether a section of plumbing is losing water.
The plumber may isolate part of the water system and monitor whether pressure remains stable.
If pressure drops when no water should be flowing, that can indicate leakage within the isolated section.
This helps narrow the problem down before walls, floors or outdoor areas are disturbed.
Pressure testing may be particularly useful when there is no obvious visible leak.
Step 3: Acoustic Leak Detection
Escaping pressurised water can create sound.
Specialised acoustic equipment can amplify those sounds and help a plumber identify where a leak may be occurring.
The plumber may listen at several points along the pipe.
As they move closer to the leak, the sound can become more noticeable.
Acoustic leak detection may help locate leaks:
- beneath concrete
- underground
- inside walls
- along concealed pipe runs
The effectiveness depends on factors such as pipe material, depth, water pressure and surrounding construction.
It does not mean every leak can be identified from sound alone.
It is one diagnostic tool that can help reduce the search area.
Step 4: Thermal Imaging
Water leaks may create temperature differences around walls, floors and ceilings.
A thermal imaging camera can detect variations in surface temperature that may not be obvious to the eye.
For example, leaking water may create:
- a cooler area on a wall
- unusual temperature patterns beneath flooring
- moisture-related temperature differences around ceilings
Thermal imaging does not allow plumbers to literally see through walls.
Instead, it identifies temperature patterns that can provide clues about where moisture may be present.
These clues can then be combined with other testing methods.
Step 5: Moisture Testing
A moisture meter can help confirm whether building materials contain elevated levels of moisture.
Testing may be carried out on:
- plasterboard
- timber
- flooring
- ceilings
- skirting boards
- walls
- other affected materials
This can help determine how far moisture has travelled.
It may also help distinguish an active plumbing leak from a previous moisture problem that has already dried.
Finding Leaks Behind Walls
Leaks behind walls are common around:
- bathrooms
- kitchens
- laundries
- toilets
- internal water lines
Possible symptoms include:
- bubbling paint
- staining
- mould
- soft plasterboard
- damp skirting
- musty smells
Before opening a wall, a plumber may combine:
- visual inspection
- pressure testing
- thermal imaging
- moisture readings
- acoustic testing
Once the likely location has been narrowed down, only the necessary section of wall may need to be opened.
That is much better than cutting multiple inspection holes while searching for the pipe.
Finding Leaks Under Concrete Slabs
Slab leaks can be particularly difficult because the water pipe may be buried beneath concrete.
Possible warning signs include:
- unexplained water usage
- warm areas on the floor
- damp flooring
- water appearing around slab edges
- reduced pressure
- sounds of running water
- cracks or moisture around flooring
In the past, locating a leak beneath concrete could involve significant exploratory work.
Modern leak detection can help narrow down the affected area before concrete is opened.
Techniques may include:
- pressure testing
- acoustic detection
- thermal imaging
- water meter testing
Once the location is identified, the plumber can determine the most practical repair method.
Finding Underground Water Leaks
Underground leaks can occur in water lines running:
- from the water meter to the home
- beneath driveways
- through gardens
- underneath pathways
- around outdoor plumbing
Signs can include:
- water bills increasing unexpectedly
- wet soil during dry weather
- soft or muddy ground
- water pooling
- unusually green grass
- reduced water pressure
Simply digging along the entire pipe route would be highly disruptive.
Leak detection equipment helps narrow down where the water may be escaping before excavation is considered.
Why Accurate Leak Detection Matters
Imagine that a pipe beneath a driveway is leaking.
Without proper investigation, someone may assume the leak is near the visible wet patch.
But water can travel underground before reaching the surface.
Digging at the wet patch may reveal nothing.
The actual leak could be several metres away.
Accurate leak detection can reduce:
- unnecessary excavation
- damage to flooring
- unnecessary wall openings
- landscaping disruption
- repair time
- reinstatement costs
The goal is targeted access rather than guesswork.
Does Leak Detection Always Mean No Digging?
Not necessarily.
Leak detection helps find the source with as little disruption as possible.
But if the damaged pipe is buried underground or beneath concrete, some access may still be required to complete the repair.
The difference is that the plumber can hopefully access the pipe at the identified location rather than digging randomly.
Think of leak detection as reducing unnecessary excavation rather than guaranteeing that no surface will ever need to be opened.
Hidden Leak vs Visible Leak
Visible Leak
A leak may be obvious when you can see:
- water dripping from a fitting
- a burst flexi hose
- water escaping from a tap connection
- an exposed pipe spraying water
These problems usually do not require specialised leak detection because the source is already known.
Hidden Leak
Professional detection becomes more valuable when:
- the water meter keeps moving
- the water bill has increased
- dampness appears without an obvious source
- water is appearing below concrete
- there is unexplained water under flooring
- a pipe is suspected of leaking underground
The less visible the pipe, the more useful targeted investigation becomes.
Leak Detection Isn’t the Same as Leak Repair
These are two separate stages.
Leak Detection
The first stage identifies:
- whether a leak appears to be present
- which section of pipe may be affected
- the likely location of the problem
Leak Repair
Once the leak has been located, the plumber determines how the damaged section can be accessed and repaired.
Depending on the problem, this may involve:
- replacing a damaged fitting
- repairing a pipe section
- rerouting plumbing
- replacing corroded pipework
- accessing a wall cavity
- opening a small section of concrete
- excavating a targeted underground area
Good diagnosis helps make the repair more focused.
What Causes Hidden Water Leaks?
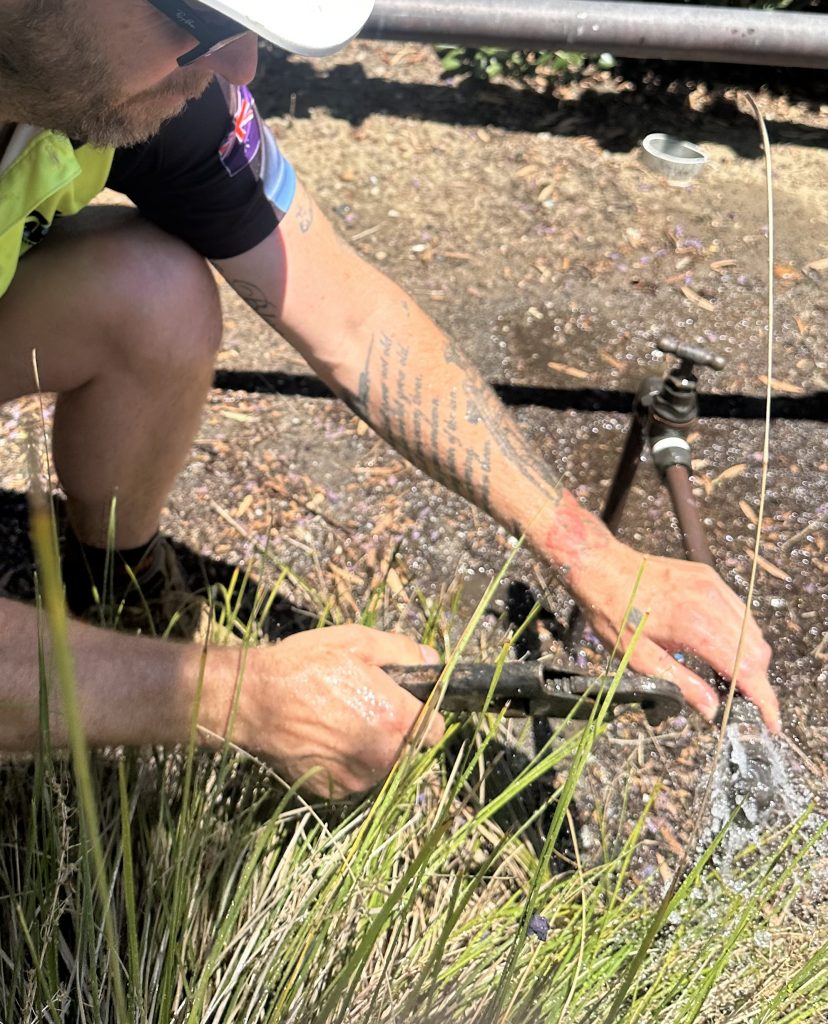
Leaks can develop for several reasons.
Ageing Pipework
Older pipes may deteriorate over time.
Corrosion, wear and repeated pressure changes can eventually create weak points.
Damaged Fittings
Connections and fittings can fail, particularly when they are concealed behind walls or cabinetry.
Pipe Movement
Ground movement or building settlement can place additional stress on pipes.
High Water Pressure
Excessive water pressure can increase stress on pipework, fixtures and connections.
Accidental Damage
Pipes can sometimes be damaged during:
- renovations
- drilling
- landscaping
- construction
- excavation
Underground Pipe Deterioration
Buried water lines may eventually deteriorate because of age, soil conditions or movement.
Identifying why the pipe failed can be useful when deciding whether a small repair is enough or more extensive plumbing work should be considered.
What Should You Do If You Suspect a Hidden Leak?
Start by checking for obvious sources.
Look at:
- toilets
- taps
- flexible hoses
- under sinks
- washing machine connections
- hot water systems
- outdoor taps
If nothing obvious is leaking, check your water meter while all water use is stopped.
If the meter still indicates ongoing usage, arrange an inspection.
For a significant or rapidly worsening leak, shutting off the main water supply may help reduce additional water damage until a plumber arrives.
When Is a Water Leak an Emergency?
Some leaks can be investigated during normal plumbing hours.
Others should be treated urgently.
Arrange emergency plumbing assistance when:
- water is flooding the property
- water is approaching electrical outlets
- ceilings are becoming heavily saturated
- a pipe has burst
- water cannot be controlled
- significant water damage is occurring
- the leak is affecting essential plumbing
- the main supply needs to remain turned off
If water is near electrical equipment, switches or wiring, avoid touching affected electrical components.
The priority is making the area safe and stopping further water flow where possible.
Don’t Ignore a Small Hidden Leak
A slow leak may look less urgent than a burst pipe.
However, a concealed leak can continue releasing water for days or weeks without being noticed.
Over time, moisture may contribute to:
- damaged plasterboard
- swollen cabinetry
- damaged flooring
- timber deterioration
- mould growth
- peeling paint
- ceiling damage
- higher water bills
Finding the leak early can reduce the amount of secondary damage.
Unexplained Water Bills Can Be a Warning Sign
If your water use has not changed but your bill suddenly increases, check whether there may be an unnoticed leak.
Possible sources include:
- leaking toilets
- dripping taps
- irrigation leaks
- underground pipe leaks
- concealed plumbing leaks
- hot water system leaks
Comparing recent bills may help identify unusual changes.
A meter test can then provide another clue.
Why Water Can Appear Far Away From the Actual Leak
Water follows gravity and the easiest available path.
Inside a building, it can travel along:
- timber framing
- pipes
- electrical penetrations
- flooring
- insulation
- wall cavities
Underground, water can move through soil and emerge somewhere completely different from the damaged pipe.
That is why the visible wet area is not always the best place to start cutting or digging.
Diagnosis should focus on the pipe system, not simply where the water eventually appears.
How a Plumber Investigates a Suspected Hidden Leak
Professional leak detection generally follows a logical process.
Step 1: Understand the Symptoms
The plumber may ask:
- When did you first notice the problem?
- Has the water bill increased?
- Is the meter moving continuously?
- Is moisture appearing inside or outside?
- Has any renovation work recently been completed?
- Has water pressure changed?
This provides clues about what type of leak may be present.
Step 2: Inspect Accessible Plumbing
Visible fixtures, fittings and connections are checked first.
There is no reason to use advanced leak detection equipment if the problem is actually a leaking toilet valve or exposed connection.
Step 3: Test the Plumbing System
The plumber may carry out meter checks or pressure testing to confirm whether water is escaping.
Step 4: Narrow Down the Location
Depending on the situation, diagnostic equipment may include:
- acoustic leak detection
- thermal imaging
- moisture testing
Step 5: Confirm the Most Likely Area
Testing results are combined to determine where targeted access should occur.
Step 6: Plan the Repair
Once the leak has been located, the plumber can explain the repair options and whether any wall opening, concrete cutting or excavation is required.
How to Reduce the Risk of Future Water Leaks
Not every leak can be prevented.
However, homeowners can reduce the chance of serious unnoticed damage.
Watch Your Water Usage
Unexpected increases in water consumption deserve investigation.
Check Flexible Hoses
Inspect visible hoses under:
- basins
- sinks
- toilets
- washing machines
Look for corrosion, bulging or deterioration.
Pay Attention to Water Pressure
Very high pressure can put additional strain on plumbing.
A plumber can check pressure if you suspect it may be excessive.
Investigate Damp Areas Quickly
Do not repeatedly repaint a damp wall without identifying where the moisture is coming from.
Know Where Your Main Water Shut-Off Is
Knowing how to isolate the water supply can make a major difference during a burst pipe or serious leak.
Don’t Ignore Running-Water Sounds
If you can hear water moving when nothing should be running, investigate it.
A Simple Hidden Leak Checklist
Inside the Home
- Check beneath sinks.
- Look around toilets.
- Inspect visible flexible hoses.
- Look for wall or ceiling staining.
- Check for bubbling paint.
- Pay attention to musty smells.
- Watch for damaged or lifting flooring.
Water Usage
- Compare recent water bills.
- Check your meter with fixtures turned off.
- Investigate unexplained increases in consumption.
Outside
- Look for unexplained wet soil.
- Check for puddles during dry weather.
- Look for unusually green patches of grass.
- Watch for moisture around paving or concrete.
Plumbing Performance
- Pay attention to reduced water pressure.
- Listen for running water.
- Investigate recurring moisture rather than simply drying it.
Key Takeaways
A hidden water leak does not automatically mean your floors, walls or garden need to be torn apart just to find the problem.
Professional leak detection can use pressure testing, acoustic equipment, thermal imaging and moisture testing to narrow down where water is escaping.
The visible damp area may not be directly above or beside the damaged pipe because water can travel through walls, floors and soil.
Accurate detection can reduce unnecessary digging, concrete cutting and wall damage.
Water meter testing can provide an early indication that water is being lost somewhere in the plumbing system.
Acoustic equipment may help locate pressurised leaks by detecting the sound of escaping water.
Thermal imaging identifies temperature differences that may indicate hidden moisture.
Moisture meters can help confirm which materials have been affected.
Some access may still be necessary once the leak is located, particularly when damaged pipes are beneath concrete or underground.
The advantage is that repair work can be targeted at the most likely location rather than based on guesswork.
And if you notice unexplained water usage, damp walls, unusual water sounds or water appearing where it shouldn’t, it is better to investigate early than wait for the damage to become obvious.
Need Leak Detection in Quakers Hill?
An unexplained wet patch today could be the first sign of a concealed plumbing leak that has already been running for some time.
If your water bill has unexpectedly increased, the meter keeps moving when your taps are off or moisture is appearing without an obvious source, the next step is finding where the water is coming from.
Local Quakers Hill Plumber can inspect suspected hidden leaks throughout Quakers Hill and help identify the affected area before unnecessary walls, flooring or outdoor surfaces are disturbed.
Whether the suspected leak is behind a wall, beneath a concrete slab or somewhere along an underground water line, the goal is the same: locate the problem accurately, minimise unnecessary disruption and determine the right repair.
Frequently Asked Questions
How do plumbers find hidden water leaks?
Plumbers may use water meter testing, pressure testing, acoustic leak detection, thermal imaging and moisture testing. The most appropriate method depends on where the leak is suspected and the type of plumbing involved.
Can a plumber find a leak without digging?
Often, yes. Non-invasive testing can help narrow down the likely location of an underground or concealed leak before excavation begins. Some targeted digging may still be necessary to access and repair the damaged pipe.
Can thermal imaging see a leaking pipe through a wall?
Thermal cameras do not literally see through walls. They detect surface temperature variations that can indicate moisture or temperature changes associated with a leak.
How do I know if I have a hidden water leak?
Possible signs include unexplained water bills, a moving water meter when fixtures are off, damp walls, mould, damaged flooring, reduced pressure, unusual running-water sounds or unexplained wet areas outdoors.
How can I check for a hidden leak using my water meter?
Turn off all water-using fixtures and appliances, then check whether the meter continues recording usage. Continued movement may indicate that water is escaping somewhere, although further investigation is needed to locate the source.
How are leaks under concrete detected?
Plumbers may combine pressure testing, acoustic listening equipment and thermal imaging to narrow down the location of a suspected leak beneath a slab.
Do you have to break concrete to repair a slab leak?
Sometimes. Leak detection can help minimise unnecessary concrete removal by identifying the most likely location first. The repair method depends on the pipe location and the nature of the damage.
Why is my water bill suddenly higher?
A higher bill may be caused by increased household water use, a leaking toilet, dripping fixtures, irrigation problems or a hidden pipe leak. Checking the water meter when everything is turned off can help determine whether further leak investigation is needed.
Can a small hidden leak cause serious damage?
Yes. Even a relatively small leak can release water continuously over time, potentially damaging walls, ceilings, cabinetry, flooring and other building materials.
When should I call a plumber about a suspected hidden leak?
Arrange an inspection when unexplained moisture keeps returning, your water meter records usage when everything is off, your water bill suddenly rises or you suspect a pipe is leaking behind a wall, beneath concrete or underground.